12 articles
Build your workflow
Section 2: Create a strong foundation for your work that’s fully optimized for you and your team.
Browse
Give your team the right context
Share the right data with anyone
Capture the right data from everyone
Interface Designer: Your guide to designing an interface
How to implement interface permissions in your workflow
Interface Designer: Simplify collaboration with the record review
Interface Designer: Highlight key details with the record summary
Interface Designer: Report on metrics with a dashboard layout
Interface Designer: When to use it + other collaboration features
Set your team up for success
Get ready for your Airtable launch
Prep your base for onboarding
Introduce your team to Airtable
Invite your collaborators
Manage team collaboration
Set (and hit) your Airtable goals
Implementation guide: Airtable for product operations
Anatomy of a product workflow
Stage 1: Collect and centralize product feedback
Step 1.1: Start tracking product feedback
Step 1.2: Centralize product feedback across sources and teams
Step 1.3: Analyze and take action on product feedback
Stage 2: Set and align on product objectives
Step 2.1: Start planning product objectives
Step 2.2: Manage product objectives across multiple teams
Step 2.3: Report on progress toward product objectives
Stage 3: Prioritize your product roadmap
Step 3.1: Start prioritizing your product roadmap
Step 3.2: Visualize your product roadmap
Step 3.3: Build an organization-wide roadmap
Stage 4: Track ongoing product delivery
Step 4.1: Start managing sprints and product delivery
Step 4.2: Manage resources and ongoing product delivery
Step 4.3: Keep your product org informed and on track
Stage 5: Manage and review product launches
Step 5.1: Start managing product launches
Step 5.2: Drive product launch retrospectives
Step 5.3: Scale launch management across your organization
Stage 6: Measure and improve product operations
Step 6.1: Start measuring and reporting results
Step 6.2: Understand the business impact of your product
Collaborate with your team16
Guide for product operations25
Guides
1 OF 12
1 OF 12
Create your database
Your data is the foundation of your workflow. That’s why the first step to building in Airtable is creating a database.
3 MIN READ

More in Build your workflow
2 of 12
Create a base
Build a base for your workflow, and explore how all the pieces of a base fit together.
4 MIN READ
3 of 12

Create a table
Create an orderly system for organizing and tracking your information by setting up tables.
5 MIN READ
4 of 12

Add data with records
Turn lists of information into records that can easily be rearranged and updated.
5 MIN READ
5 of 12

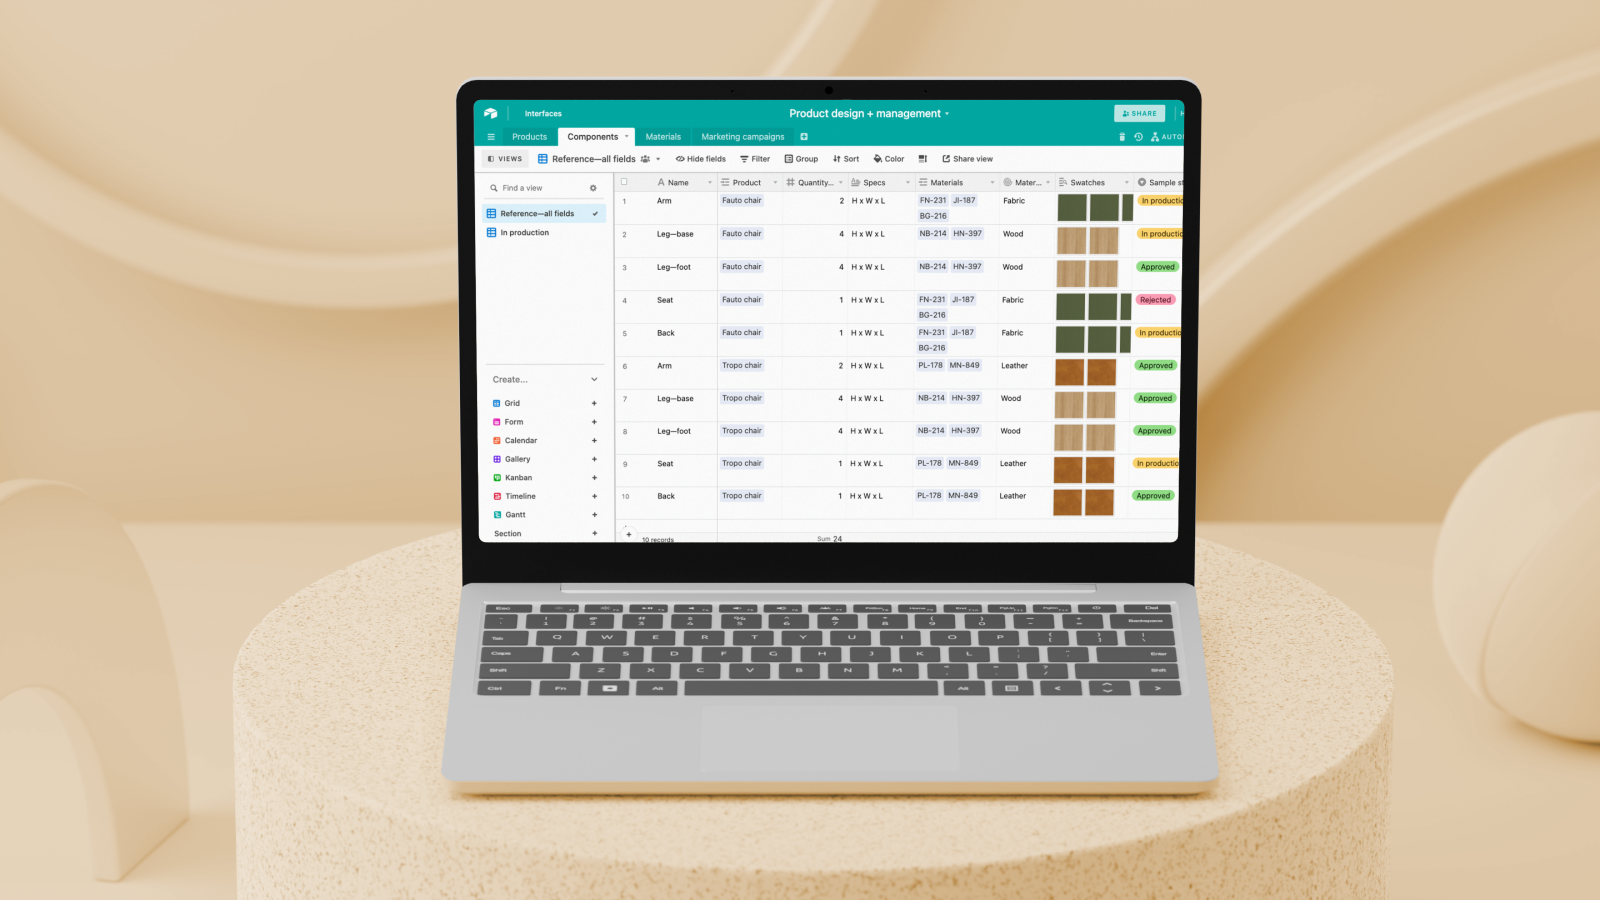
Organize data in fields
As you continue building your base, manage various types of data and details of your work with fields.
7 MIN READ
6 of 12
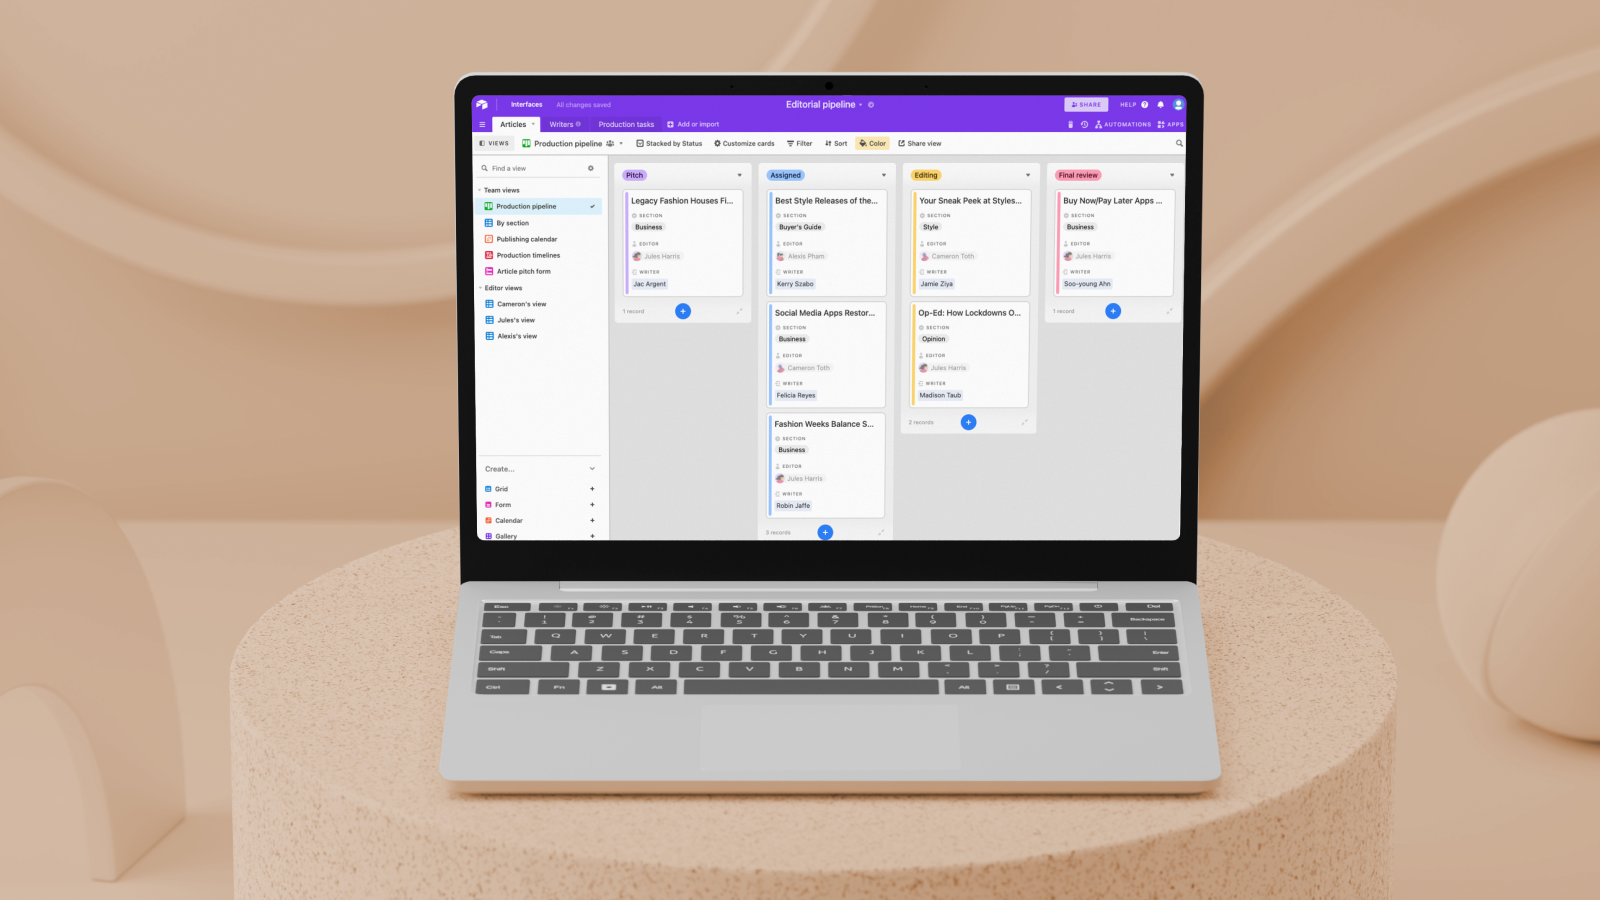
Create custom views of your data
Build custom views of work for each member of your team, tailored to their individual needs.
12 MIN READ
7 of 12

Connect your data with linked records
Linked records let you cross-reference and get additional context from every item in your base. Learn how.
6 MIN READ
8 of 12

Design your workflow
Understand your workflow’s mechanics, and translate them into a custom Airtable solution that’s tuned in to your team’s exact needs.
2 MIN READ
9 of 12

Map out your workflow
Get familiar with your workflow and map out the steps your team takes to get their work done.
8 MIN READ
10 of 12

11 of 12

Import data from other tools
Get started right where you left off by importing data directly from spreadsheets or task managers into Airtable.
6 MIN READ
12 of 12

6 common Airtable design decisions
Fine tune your base design with best practices that will help your workflow scale with you and your team.
6 MIN READ
Browse
Give your team the right context
Share the right data with anyone
Capture the right data from everyone
Interface Designer: Your guide to designing an interface
How to implement interface permissions in your workflow
Interface Designer: Simplify collaboration with the record review
Interface Designer: Highlight key details with the record summary
Interface Designer: Report on metrics with a dashboard layout
Interface Designer: When to use it + other collaboration features
Set your team up for success
Get ready for your Airtable launch
Prep your base for onboarding
Introduce your team to Airtable
Invite your collaborators
Manage team collaboration
Set (and hit) your Airtable goals
Implementation guide: Airtable for product operations
Anatomy of a product workflow
Stage 1: Collect and centralize product feedback
Step 1.1: Start tracking product feedback
Step 1.2: Centralize product feedback across sources and teams
Step 1.3: Analyze and take action on product feedback
Stage 2: Set and align on product objectives
Step 2.1: Start planning product objectives
Step 2.2: Manage product objectives across multiple teams
Step 2.3: Report on progress toward product objectives
Stage 3: Prioritize your product roadmap
Step 3.1: Start prioritizing your product roadmap
Step 3.2: Visualize your product roadmap
Step 3.3: Build an organization-wide roadmap
Stage 4: Track ongoing product delivery
Step 4.1: Start managing sprints and product delivery
Step 4.2: Manage resources and ongoing product delivery
Step 4.3: Keep your product org informed and on track
Stage 5: Manage and review product launches
Step 5.1: Start managing product launches
Step 5.2: Drive product launch retrospectives
Step 5.3: Scale launch management across your organization
Stage 6: Measure and improve product operations
Step 6.1: Start measuring and reporting results
Step 6.2: Understand the business impact of your product