Capture the right data from everyone
Airtable
8 min read
Written by
Airtable
Filed Under
Collaborate with your team
TOPICS
Capture the right data from everyone
Now that you’ve built your base, you want to ensure it stays accurate and up-to-date. There are many ways to accomplish this: You can import spreadsheets, create external sync integrations with platforms like Salesforce or Jira Cloud, or simply copy and paste data. But one of the easiest, and most popular, ways to add new data is through forms.
Airtable forms are a simple and powerful way to get the right information into your workflows. A form is easy to build, and lets you efficiently capture user submissions.
In this step, learn how to create a custom form that lets you survey anyone you want, then view, analyze, and implement their responses—while protecting access to the underlying records.
Forms: What they do and how to use them
Forms allow you to collect information from your team and pipe it directly into a base where you can organize and analyze it. Many teams use forms for workflows like submitting requests and collecting feedback.
Because forms are technically a “view” of your data, you create a form in the same way you’d create any other view—with just a few clicks. You can use existing fields from your base as prompts, or you can add new ones. You can also adjust the text of any field, or add help text to give respondents context. Whenever someone fills out the form, their response is automatically added to your table as a new record.
Additionally, field types from your table carry over to your form. For example, if you use Airtable to visualize upcoming deliverables, the “due date” field will show up on your form as a date-picker. This helps prevent people from entering different formats for the date that wouldn’t render in your calendar view.

If your workspace is on the Team, Business, or Enterprise Scale plan, you can customize your forms by adding a cover image and logo, customizing the form submission button, and (optionally) removing the Airtable branding from the form.
Here are a few tips for getting the most out of forms:
1. Quickly collect information from anyone
Once your form is ready, you can share it with anyone by generating a link or embedding it on a webpage. You can even make your link accessible outside of your company, so you can gather input from customers, clients, or contractors—without giving them access to your base.
Pro tip
To encourage form completion, aim to keep your form as short as possible. You can always add additional notes or context as needed, once form responses are in your table (more on that below).
2. Add context to make decisions
Add additional fields to your table to help organize form submissions. For example, let’s say you’re using forms to collect applications for an open role on your team. When people fill out the form, you’ll see the information they provided (like name, contact information, and their resume). You can then add additional fields alongside this information in your base to keep track of their application status, interview dates, or notes from interviewers.
3. Streamline intake process
Many customers use forms to streamline work requests. The structured nature of forms makes it easy for requesters to provide the information you need—no more going back and forth, or reminding your colleagues to include the right links.
Using forms can keep requests from falling through the cracks. Try these strategies to keep on top of your requests:
Turn on email notifications, so you get an alert whenever a new form is submitted
Add a “Status” field in your table and set up a view to group by “Status” so “Requested” entries show up at the top of your list

Take action: Create your first form
Now that you know how forms can help your team, you’re ready to try it on your own. Here’s what you need to do to get started:
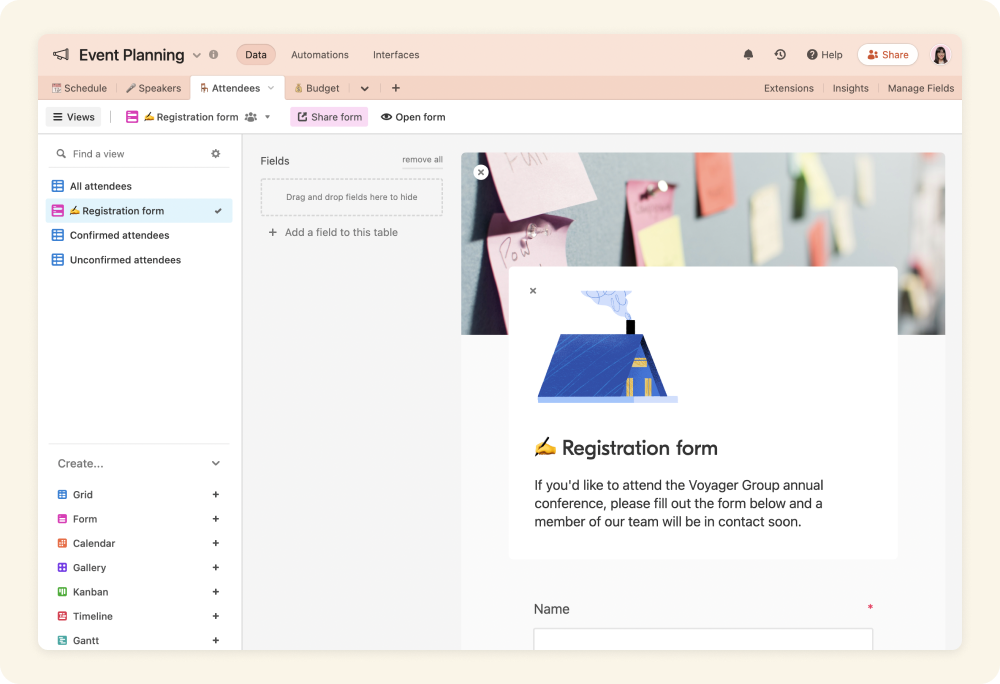
1. Create a form view. Choose the table you’d like to create a form, then select Form in the lower left corner of the view sidebar. Customize which fields you want to surface by dragging-and-dropping, and determine which fields are required for a submission.
2. Share your form. Once all the fields in your form are added and customized, select the Share form button to generate a unique link you can send to anyone.
3. Review submissions. With your form link shared, you can start collecting submissions that populate as new records in your table. Review the data in each submission, whether it’s a job application or a feedback survey.
If you need additional support on forms, you can also view step-by-step directions in our Help center.